BillboardXT User’s Guide
I.
To create a new BillboardXT presentation
a.
Save
b.
Text
i.
title
ii.
hyperlink
iii.
transition effects
iv.
font
v.
text
vi.
text color
vii.
text transparency
viii.
edge effect
ix.
edge color
xi.
frame
xii.
frame color
xiii.
frame transparency
xiv.
view window
c.
Images
i.
title
ii.
hyperlink
iii.
transition effects
iv.
shape
v.
transparency
vi.
view window
d.
New page
e.
Z-order
f.
Page order
h.
Page editing
VI.
To add pages to a presentation
VII. To add pages to an account
The BillboardXT provides a simple way for internet users to make or to view presentations anytime, anywhere. By using BillboardXT, you have access to a wide variety of features including easy-to-use graphic display and editing, professional animation effects, text editing, control of others’ view and editing of a presentation, as well as safe security features. With your presentation accessible straight from the internet, there should be no problem in showing or changing it whenever needed.
To create a new BillboardXT
presentation:
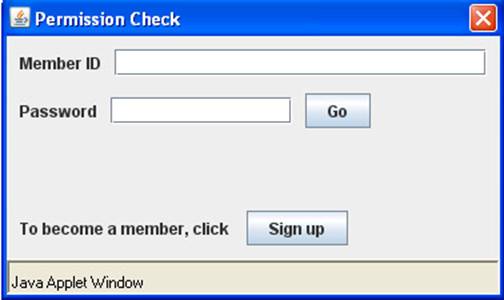
1) Become a member in order to access BillboardXT presentation features.
2) Once a member, sign in using your new account member id and password
3) Open the Presentation folder and click the Create/Edit link
4) Enter a name for the presentation you are creating. If you already have created a presentation in the past, then in order to add another presentation, you must have at least 3 more available pages in your account. To obtain more pages, see [To further add pages to an account] or [To further add pages to a presentation]
To access a presentation:
1) Type in the URL: www.xtratek.com/fview.php5?id= followed by the id code of the presentation. (For example: http://www.xtratek.com/fview.php5?id=nstq5218hw)
2) If you have forgotten or do not know the id code of your presentation, click on the Member Sign In link. Enter your member id and password, and open up the Presentation folder at the left side of the page. Click on the Create/Edit link, then copy and go to the URL of the appropriate presentation.
To edit a presentation:
1)
Access a presentation by seeing [To access a
presentation]
2)
Once at a presentation, you may use your editing features by first
clicking the button ![]() beneath the
presentation screen, next to the play/pause button.
beneath the
presentation screen, next to the play/pause button.
3) The yellow buttons from left to right are:
· Go To Page ![]() -
goes to a page
-
goes to a page
· Text ![]() - adds
text box
- adds
text box
· Image ![]() - uploads
and displays image
- uploads
and displays image
· New page ![]() - adds
another page
- adds
another page
· Z-order ![]() -
determines order of overlapping images / text
-
determines order of overlapping images / text
· Page order ![]() -
determines order or deleting of pages
-
determines order or deleting of pages
· Save ![]() - saves
progress to the web server
- saves
progress to the web server
4) The blue buttons from left to right are:
· Editing
permission ![]() - checks
your current editing capacity
- checks
your current editing capacity
· Help ![]() - opens
user’s guide (this document)
- opens
user’s guide (this document)
5) To edit existing images or text or an entire page, right click the item for editing options. To move images or text, left click and drag the item.
Go To Page: To skip to a certain page of your presentation, select it and click the Go to the Page button. Also, each page has a unique edit permission ID shown, which is to be used during edit control; see [To set edit control]
Save: To save editing progress, click the yellow “save? button. Enter your member id and password if you haven’t already passed permission check previously. If you can not pass permission check with your member id and password, then you haven’t been given editing permission by the owner.
Text: To create a text box on your presentation page, click the yellow “text” button. To edit a text box, right click it for editing options.
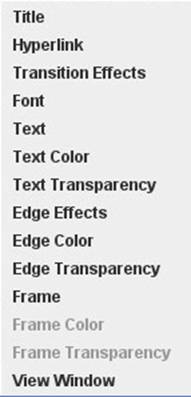
- Title: sets the title of the text box, NOT the text itself, to be referred to while using the Z-order editing option; see [Z-order]
- Hyperlink: creates a hyperlink of the text box
- Transition effects: controls movement and animation of the text box; current X and Y position of text is displayed on top of transition effect box
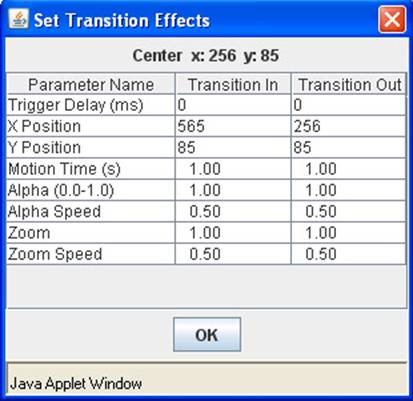
i. Trigger delay - sets the amount of time (in milliseconds) for the text to be delayed before transitioning in after the appearance of the page; also sets the amount of time (in milliseconds) for the text to be delayed before transitioning out after the elapsed time of the page has passed; see [Page]
ii. X position / Y position - establishes position of the text box at the beginning of its transition in and at the end of its transition out of the page, with X being the distance (in pixels) from the left side and with Y being the distance (in pixels) from the top of the page
iii. Motion time - the amount of time (in seconds) for the text box to move either from its transition in to its page position, or from its page position to its transition out
iv. Alpha - controls the transparency of the text box at both the time of its transition in and out, with 0 representing an invisible text and with 1 representing the set text transparency for its page position; see [Text transparency]
v. Alpha speed - controls the speed of the change in transparency (alpha) of the text from its transition in to its page position or from its page position to its transition out
vi. Zoom - establishes the scale (size) of the text box at the beginning of its transition in or at the end of its transition out
vii. Zoom speed - controls the speed of the change in scale of the text from its transition in to its page position or from its page position to its transition out
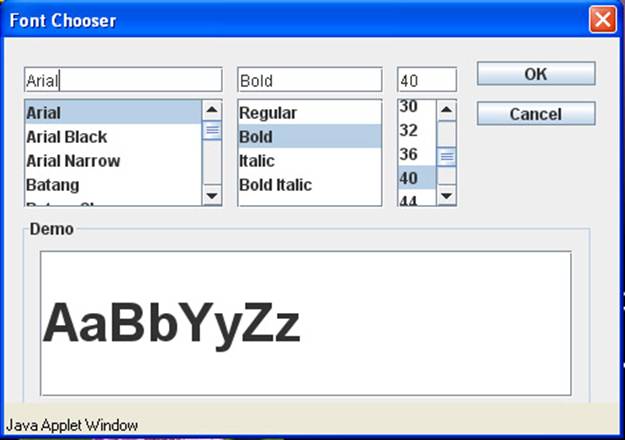
- Font: controls the font type, size and style of the words in the text box
- Text: sets the words to be displayed in the text box
- Text color: controls color and color gradient of the text
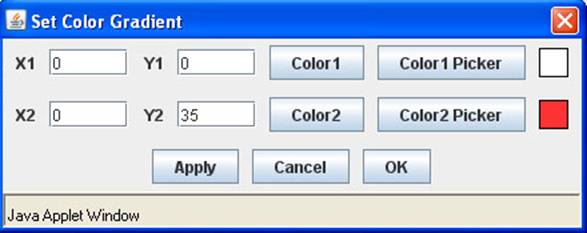
i. (X1, Y1) and (X2, Y2) both represent a point within the area of the text box, with X representing the distance from the left side of the text box (in pixels), and with Y representing the distance from the top of the text box (in pixels); each point represents a color, and in between, a color gradient
ii. The colors for (X1, Y1) and (X2, Y2) are chosen with the Color 1 and Color 2 buttons; Color 1 Picker and Color 2 Picker allow you to choose an existing color on the presentation page to use
Text transparency: controls the transparency (alpha) of the text at its page position, with 0 representing invisible text, up to 1 representing solid text
- Edge effect: controls options on appearance of text edges
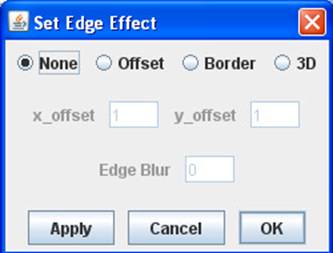
i. None - removes border from your text
ii. Offset - adds drop shadow to your text, with X-offset and with Y-offset as the distance (in pixels) of the shadow to the right of and below the original text
iii. Border- adds a border surrounding your text, with X-offset and Y-offset determining the width of the border
iv. 3D - adds a 3D border to your text, with X-offset and Y-offset determining the width of the border
v. Edge Blur - sets the border to have a hazy appearance.
- Edge color: controls color and color gradient of the text border / edge
i. (X1, Y1) and (X2, Y2) both represent a point within the area of the text border, with X representing the distance from the left side of the text edge (in pixels), and with Y representing the distance from the top of the text edge (in pixels); each point represents a color, and in between, a color gradient
ii. The colors for (X1, Y1) and (X2, Y2) are chosen with the Color 1 and Color 2 buttons; Color 1 Picker and Color 2 Picker allow you to choose an existing color on the presentation page to use
- Edge transparency: controls the transparency (alpha) of the border, with 0 representing invisible text edge and 1 representing an opaque border
- Frame: allows you to enable a frame effect around your text; default left, right, top and bottom widths are set at 0, and any greater number increases the size of the frame in any one direction
- Frame color: controls color and color gradient of the frame
i. (X1, Y1) and (X2, Y2) both represent a point within the area of the text frame, with X representing the distance from the left side of the frame (in pixels), and with Y representing the distance from the top of the frame (in pixels); each point represents a color, and in between, a color gradient
ii. The colors for (X1, Y1) and (X2, Y2) are chosen with the Color 1 and Color 2 buttons; Color 1 Picker and Color 2 Picker allow you to choose an existing color on the presentation page to use
- Frame transparency: controls the transparency (alpha) of the frame, with 0 representing an invisible frame and 1 representing an opaque frame
- View window: allows you to set only a certain portion of the text to be seen, with left and top as the distance (in pixels) inward from the top and left sides of the page, and with width and height as the dimensions of the view window itself
Images: To insert an image on your presentation page, click the yellow “image” button. Enter your member id and password if you haven’t already passed permission check previously. If you can not pass permission check with your member id and password, then you haven’t been given editing permission by the owner.
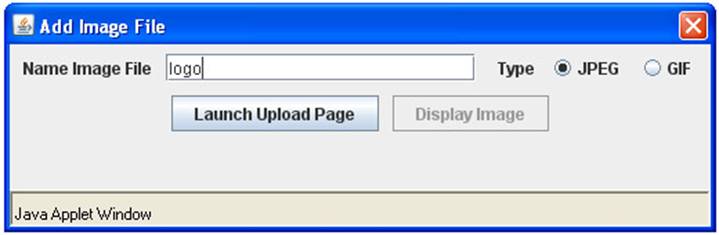
After clicking on the yellow image button, enter the image location into the text box or click the Browse button to find the image at the bottom of the page
![]()
Once the image location has been found, click the Upload File button (the maximum size of an image file is 400kb).Wait until at the bottom of the page, a message is displayed saying that the file is successfully uploaded, then click the Display Image button back on top to show the image on the presentation page. To edit an image, right click it for editing options.
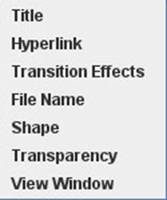
- Title: sets the title of the image to be referred to while using the Z-order editing option; see [Z-order]
- Hyperlink: creates a hyperlink of the image
- Transition effects: controls movement and animation of the image; current X and Y position of image is displayed on top of transition effects box
i. Trigger delay - sets the amount of time (in milliseconds) for the image to be delayed before transitioning in after the appearance of the page; also sets the amount of time (in milliseconds) for the image to be delayed before transitioning out after the elapsed time of the page has passed; see [Page]
ii. X position / Y position - establishes position of the image at the beginning of its transition in and at the end of its transition out of the page, with X being the distance (in pixels) from the left side and with Y being the distance (in pixels) from the top of the page
iii. Motion time - the amount of time (in seconds) for the image to move either from its transition in to its page position, or from its page position to its transition out
iv. Alpha - controls the transparency of the image at both the time of its transition in and out, with 0 representing an invisible image and with 1 representing the set image transparency for its page position; see [Transparency]
v. Alpha speed - controls the speed of the change in transparency (alpha) of the image from its transition in to its page position or from its page position to its transition out
vi. Zoom - establishes the scale (size) of the image at the beginning of its transition in or at the end of its transition out
vii. Zoom speed - controls the speed of the change in scale of the image from its transition in to its page position or from its page position to its transition out
- Shape: establishes the overall shape of the image
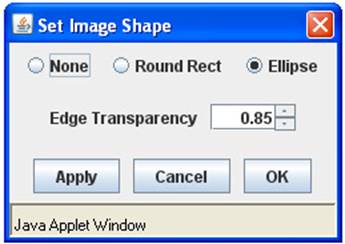
i. None - maintains the original shape of the image
ii. Round rectangle - rounds the corners of the image
iii. Ellipse - forms an oval of the image
Edge transparency allows you to merge the outer boundaries of the image with the background by making its edges transparent; 0 makes the image’s edges almost completely transparent, all the way up to 1, which makes the image’s edges solid.
- Transparency: sets the transparency (alpha) of the image at its page position, with 0 representing an invisible image, up to 1 representing a solid image
- View window: allows you to set only a certain portion of the image to be seen, with left and top as the distance (in pixels) inward from the top and left sides of the page, and with width and height as the dimensions of the view window itself
New page: To add a new page to your presentation, click the yellow “new page” button. Enter the name of your new page to be added, and a new blank page should appear. If you do not have any remaining pages, the program will not allow you to save progress farther than the pages you currently own. Also, once upon reaching an empty page during a presentation, the presentation will not continue until you have placed at least one item on the page.
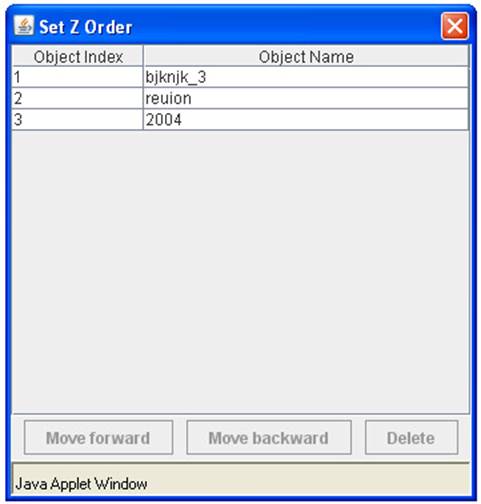
Z-order: To control the Z-order of the items on your presentation, click on the yellow “Z-order” button. On the Z-order page, click the object name on the current page of your presentation that you wish to move. To move the object in front of other objects, click the Move Forwards button. To move it behind other objects, click the Move Backwards button. You may also delete any object by clicking the Delete button, which may also be done straight from your presentation page by pressing the delete key.
Page order: To control the order of the pages in
your presentation, click on the yellow “page order” button. To move the page
forward in the presentation, click the Move Forwards button. To move it
backwards in the presentation, click the Move Backwards button. You may also delete
any page by clicking the Delete button. 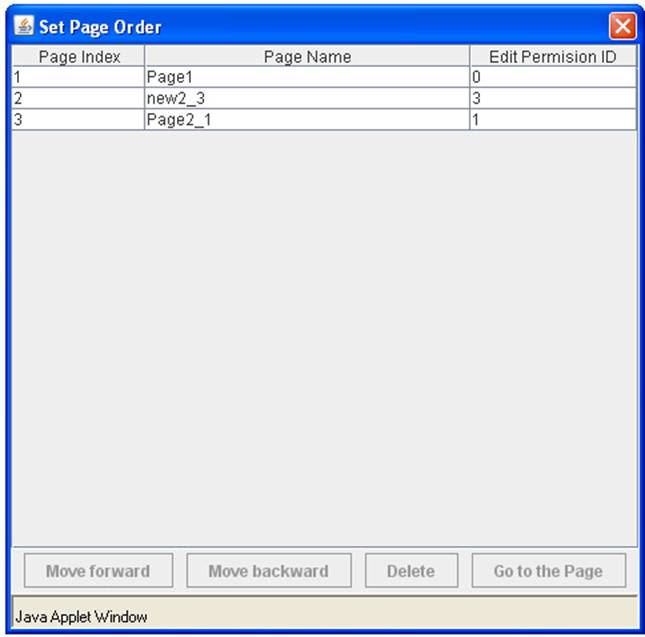
Editing permission: To see what you can currently edit, click the blue “editing permission” button. Enter your member id and password to see if you have limited or full permission. If your editing permission is limited, you may see which pages you have allowed to edit and save. To set edit control on one of your own presentations, see [To set edit control]
Page editing: To edit an entire page, right-click the page background where no picture or image exists.
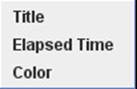
- Title: sets the title of the page to be referred to while using the page order editing option; see [Page order]
- Elapsed time: sets the amount of time (in milliseconds) for the page to remain in page position, after the transition in and before the transition out of text and images
- Color: controls color and color gradient of the page background
i. (X1, Y1) and (X2, Y2) both represent a point within the area of the background, with X representing the distance from the left side of the page (in pixels), and with Y representing the distance from the top of the page (in pixels); each point represents a color, and in between, a color gradient
ii. The colors for (X1, Y1) and (X2, Y2) are chosen with the Color 1 and Color 2 buttons; Color 1 Picker and Color 2 Picker allow you to choose an existing color on the presentation page to use
1) Sign in using your account member id and password
2) Open the Presentation folder and click the Set View Control link
3) All of the presentations under your account will be listed, and for each, the option of either full public view or view by listed members. Click the option of which you want.
4) If you choose the option of view by the following members, fill in the first and family names that these members used to create their accounts. Use proper capitalization since the entered name will be case sensitive.
5) After choosing your option, click the Update button in order to save the changes
2) Open the Presentation folder and click the Set Edit Control link
3) All of the presentations under your account will be listed, and for each, fill in the first and family names that the members, of whom you wish to allow to edit and save certain pages of your presentation, used to create their accounts.
4) Next to the names of these members, fill in the permission ids of the pages that you wish to allow them to edit and save. If there is more than one page that you wish to allow them to edit and save, then separate permission ids with a comma. To see the permission ids of certain pages, see [Page order]
To further
add pages to a presentation:
1) Sign in using your account member id and password
2) Open the Presentation folder and click the Create / Edit link
3) Type in the number of pages you wish to add into any one of your presentations in the column under “Add Pages? This will not appear if you have no pages remaining in your account. To add pages to your account, see [To further add pages to an account]
To further add pages to an
account:
1) Click the Order New Services link near the top of the page
2) Click the Add Additional Page link
3) Add to the basket the quantity of pages you wish to purchase
4) Once done, click the Checkout link at the top right corner of the screen
5) If you have not previously created a specialized shopping account, click the Create New Account link. If you wish to pay without the use of a shopping account, click the Place Order Without Account link.
6) Fill in the necessary information. It is important to use your member id as the filled in Email Address so that your pages may be sent properly to your account.